Introduction
The 3CX Live chat software allows you to answer calls and messages from website visitors directly from 3CX. Read more about the Live Chat solution.
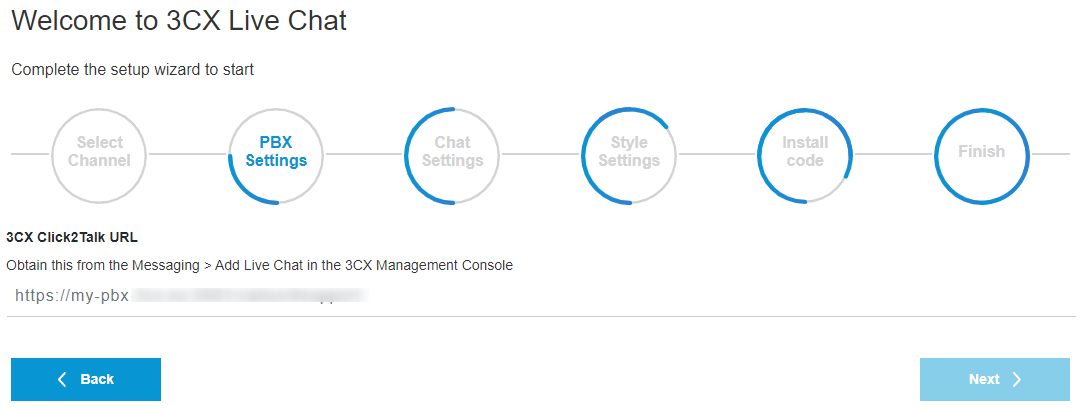
Step 1: Configure Live chat in 3CX

- Go to “Messaging” in the Management Console.
- Select “Add Live Chat.”
- Specify the URL of your website. Include any subdomains that you might be installing live chat on as well.
- Specify to which extension or queue you want to route chats and calls to.
- A Click2Talk URL will be shown. You need to take note of this URL as it will be needed during installation of the Live chat box on your website.
Step 2: WordPress users: Install the Live chat plugin
- If you have WordPress, download & install the WordPress plugin.
- If you do not want to install an additional plugin you can generate the HTML code to copy into your website here.
- The live chat box will be enabled on all pages by default. You can limit the display of the Live chat box to particular pages using the “Settings > General Settings” page. See the plugin manual for more information.
Step 3: Non wordpress users: Generate the Live Chat code
- If you do not have WordPress, go to the HTML generator here to generate the code to put on your website.
- Copy the code into the web pages on which you want to have the live chat box appear or put it on footer to have it site wide. See our guides for the following popular CMS systems where how to insert the live chat code.
Step 4: Configure the Live Chat box.
Both the plugin and the HTML code generator will take you through the same wizard to configure the Live Chat box for your website.
- Paste in the Click2Talk URL from Step 1.
- Specify whether you want to allow visitors to Voice (and optionally Video) call you besides normal text chat.
- Decide whether you want to require visitors to enter Name and Email before they can start chatting / talking with you.
- Choose the colors based on website color branding.
- If using the WordPress plugin, click “Start now”.
- If using the HTML generator choose between CDN or uploading the live chat code to your website. We recommend CDN because it’s faster and will be updated automatically. If you choose to upload it to your web server, specify the full URL. Save the code snippet to your hard disk and insert the code snippet into your CMS (As per the guides above).
Step 5: Customize the Live Chat Box
Get more information on how to configure pre-chat, chat functionality, branding and offline mode, by visiting the guide on how to Setup your Live Chat box
Leave A Comment?