Removing temporary files on Windows 10 version 1903 and later
Use these steps to remove temporary files using the Settings app on Windows 10 version 1903, 1909, and later releases:
- Open Settings.
- Click on System.
- Click on Storage.
- Under the “Local Disk” section, click the Temporary files option.

Storage settings on Windows 10 version 1903
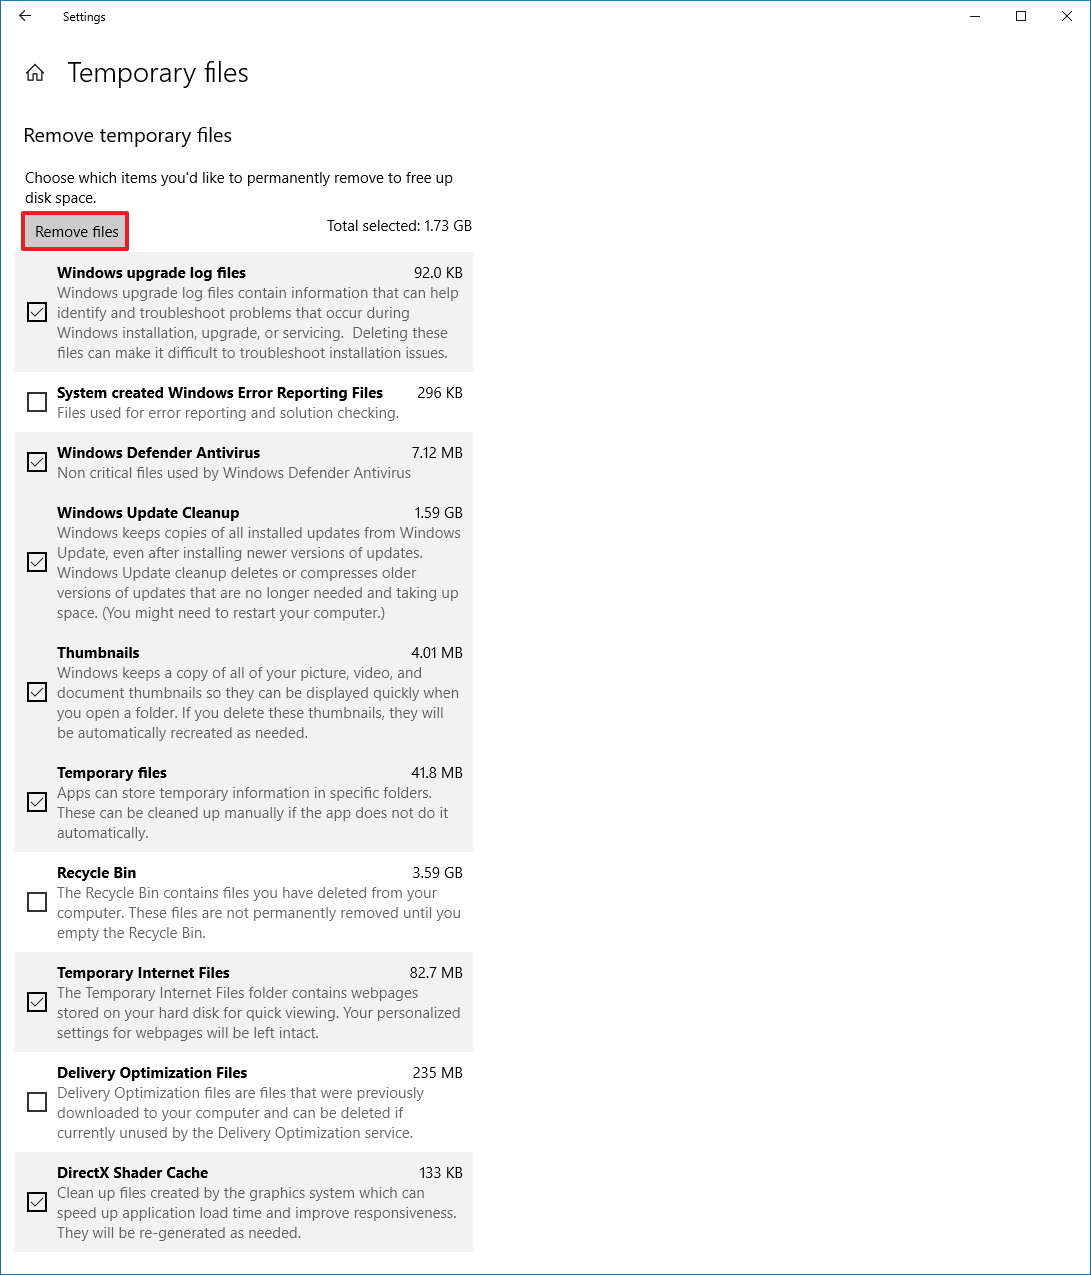
- Select the temporary files to be removed.
- Click the Remove files button.

After you complete the steps, junk files will be removed from your computer freeing up space for more important files.
Removing temporary files on Windows 10 version 1809 and earlier
Use these steps to manually remove temporary files using the Settings app on Windows 10 version 1809, October 2018 Update, and older releases:
- Open Settings.
- Click on System.
- Click on Storage.
- Click the Free up space now link.

- Select the files you want to delete, including:
-
-
- Windows upgrade log files.
- System created Windows Error Reporting files.
- Windows Defender Antivirus.
- Windows Update Cleanup.
- Thumbnails
- Temporary files.
- Recycle Bin.
- Temporary Internet Files.
- Delivery Optimization Files.
- DirectX Shader Cache.
- Previous Windows Installation(s).
-
- Click the Remove files button.
Once you complete the steps, those files you selected will be permanently deleted from your computer freeing up space for more valuable files.
If you’re deleting a previous version of Windows 10, consider that you won’t be able to roll back to an earlier version without these files. However, after a feature update installs on your computer, the operating system automatically removes these files anyway after 10 days.
Leave A Comment?